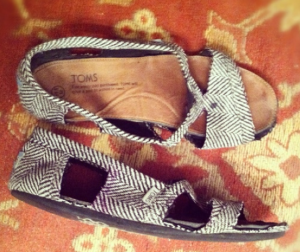
As our TOMS start to get older and our toes start to creep through, not attractive. However, there are so many amazing ways to save those TOMS, and that’s by making them into adorable sandals! The fist time I attempted this fashionable project, I was a little nervous! But honestly it’s pretty hard to mess up, so here are a few tips and tricks how to reinvent your TOMS!
What You Need:
– A Pair Of TOMS
– Scissors
– Frog Tape
– Pencil
– Clear Nail Polish
– Acrylic Paint (If you want to add some color to your TOMS)
– Glitter (if you want some bling)
You can design your TOMS however you like, so it’s pretty stress-free! Take your pencil and design them into shapes of how you want them to look. The hole that was at the tip of my shoes, I used my scissors to cut the top and bottom layers off. This is optional, you can cut the holes at your toes diagonal (along the diagonal stitch) or you can cut them into more of a straight cut, and that’s what I like to do. I poked a few more holes to create some fun designs to the sides and cut them out as well. Once I’m finished cutting out all my shapes, I use my finger nail polish and paint around the seams to prevent them from becoming fringy. But if you like the fringy look, don’t apply any nail polish and they will look more “boho.” If you want, add some fun acrylic paint to your TOMS to give them some color! On one of my pairs I actually used glitter, so that’s another fun and sassy way to add some style to your TOMS! If you choose to add some sparkle, use fabric glue and a small paintbrush (to apply the glue). Shake some glitter on the glue and whaaa-laaaa! Make sure to apply glitter ASAP so the glue doesn’t dry!
It’s totally up to you how your want to personalize your TOMS. Have fun with it, and make those TOMS fashionable once again with your new reinvented look!


Hi! I love your DIY toms into sandals .. And I tried to do it myself but the front part didn’t look as nice as yours .. Do you have measurements for like what you cut especially around the strap part and what angles you cut at to get them to look like that?
Thank you so much!